
6 min read
.jpg)
NetSuite has the wonderful ability to send emails for almost every transaction.
Opportunity, Quote, Sales Order, Item Fulfillment, Invoice, Credit Memo and Return Authorization just to name a few.
This preference is enabled when the Email Transactions checkbox is checked in the Preferences subtab of the customer or vendor record. (Location may change if working with a custom form; check with your administrator to locate the field).
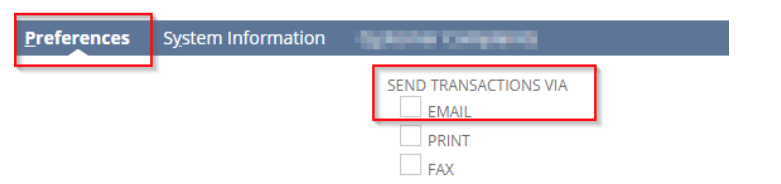
When enabled, NetSuite will send an email to the primary email saved in the customer or vendor record.
Sometimes, a company may want to email specific transactions only. For example, a company may want to send only sales order acknowledgment, shipment confirmations, and notification of paid invoice or cash sale transactions.
To perform this customization, we need the following:
- Disable the global preference “Customers Default to Email Transactions”.
Navigate to Setup > Company > Email Preferences.
- Uncheck the “Send Transactions via Email” for all customer and vendor records.
May also use the Mass Update tool to uncheck this preference in bulk.
- Create a workflow to send the emails. A workflow is a customization tool in NetSuite to assist in automating actions in a process; we have another blog providing more explanation on a workflow.

Here are the basic steps to create the workflow.
a. Navigate to Customization > Workflow > Workflows > New
b. Populate the following:
1. Name: This will be the name of your workflow, you can name it something like “Email Sales Order Acknowledgement”.Workflow logs will appear in the system information section of the record type you are creating the workflow for. These workflow logs will provide information on why a workflow action did not execute. Very handy when troubleshooting your workflows.
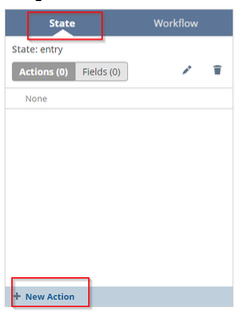
1. Initiation: select “Event Based”c. Create an action in your workflow
- Navigate to State > New Action
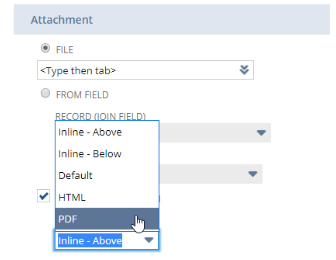
You can select a specific employee from the sender list, or from a specific NetSuite record field. For example, you can select the creator of the sales order or the sales rep saved on the sales order transaction.
4. Select a Recipient of the emailYou can select a specific email saved on the sales order transaction or in the customer record.
*Additional Customization Free Tip: Create a custom email field in the customer record and name that field a specific role for that customer record (i.e. Buyer, Accounts Receivable). This will provide you with options to save more emails for the customer record than just using the primary email field.
When the workflow is saved, create a test sales order. After saving the sales order, verify receipt of email.
This workflow can be applied against other transaction subtypes in the workflow definition page. Each workflow can be customized with different subjects, messages and field data can be sourced from the specific transaction.
Written by: Brianne Yeomans, Senior Business Consultant
Want direct NetSuite Assistance? Have NetSuite Questions? Let’s talk! Protelo’s expert consultants are here for your business!
READ MORE NETSUITE TIPS, TRICKS & HOW-TO’S
- NetSuite Guidelines and Tips for Importing CSV Files
- Creating Custom Segments in NetSuite
- NetSuite Tips for Administrators
- NetSuite User Group
- What types of users are available in NetSuite?
- The Ultimate Guide to NetSuite Modules
- How to create, edit and manage custom KPIs
- NetSuite Services List
- Why Protelo?
Check out our NetSuite resources: NetSuite tips, tricks, and how-to blog posts from our experts!
We can help you to implement, service and support NetSuite today.
Follow us on Social for NetSuite tips, tricks and ERP fun:
YouTube, LinkedIn, X, Pinterest, Instagram, and Facebook